My UX Design Process
We tackle UX challenges through a 6 step process
- Understand - Get to know an organization, its products and struggles
- Research - Survey individuals to learn about their needs, frustrations, and desires.
- Sketch - This phase is where my designs start to come to life.
- Design - This is where I create graphics, icons, color schemes, and choose fonts.
- Development - Work with developers or develop a website on my own
- Testing - Perform tests to ensure the site functions correctly and perform A/B tests.
Step 1
Understand
During this phase, I conducted brainstorming sessions with various employees throughout the client's organization. I wanted to understand what they felt were the most important aspects of their site, what customers wanted to see, what they would like to improve and any issues that they currently have. The information that I collected in this phase would become the basis for the questions that I would ask in phase 2.
Step 2
Research
During this phase, I created a survey and obtained roughly 200 responses from people that used the client's site. The survey helped us understand their needs, frustrations, and desires.
From these results, we found that users of a real estate site were eager to find properties based on their own preferences (# of bedrooms, # of bathrooms, square footage, location, schools, etc). They were also interested in being able to see locations on a map so that they can more easily find properties that are near their desired location.
Personas
After collecting the data I grouped users into several different personas. These personas were the basis for me to think about user interactions from many different points of views.

Tom the Extravagant Renter
Eager to rent a new place, doesn't care how much it costs but it must be very nice. Location is key and it must have a gym.

Stacy the Modest Tennant
Not in a hurry to rent and is looking for a deal. She wants the property to be very nice and not too far from work.

Leroy the Cheap One
Like to save money as much as possible and a low-cost apartment is important. He is content with a no-frills location.

Alexa the Great
Looking for the best home that money can buy. Money is no object but let's not get carried away, $10 million is too much.

Jennifer the Reasonable
Looking for a home that is very nice and will appreciate the most. She doesn't want to have too high of a mortgage payment.

Pascal the Cheap Owner
Looking for a place of his own and doesn't want to spend too much. He doesn't want very much yard or housework.
User Stories & User Flows
Once we developer personas we started creating stories that outlined how each user would accomplish something on the site. We determined what each user would be looking for, what features they would like to have seen, and how they would like to see data displayed. This resulted in a user story document.
Step 3
Sketch
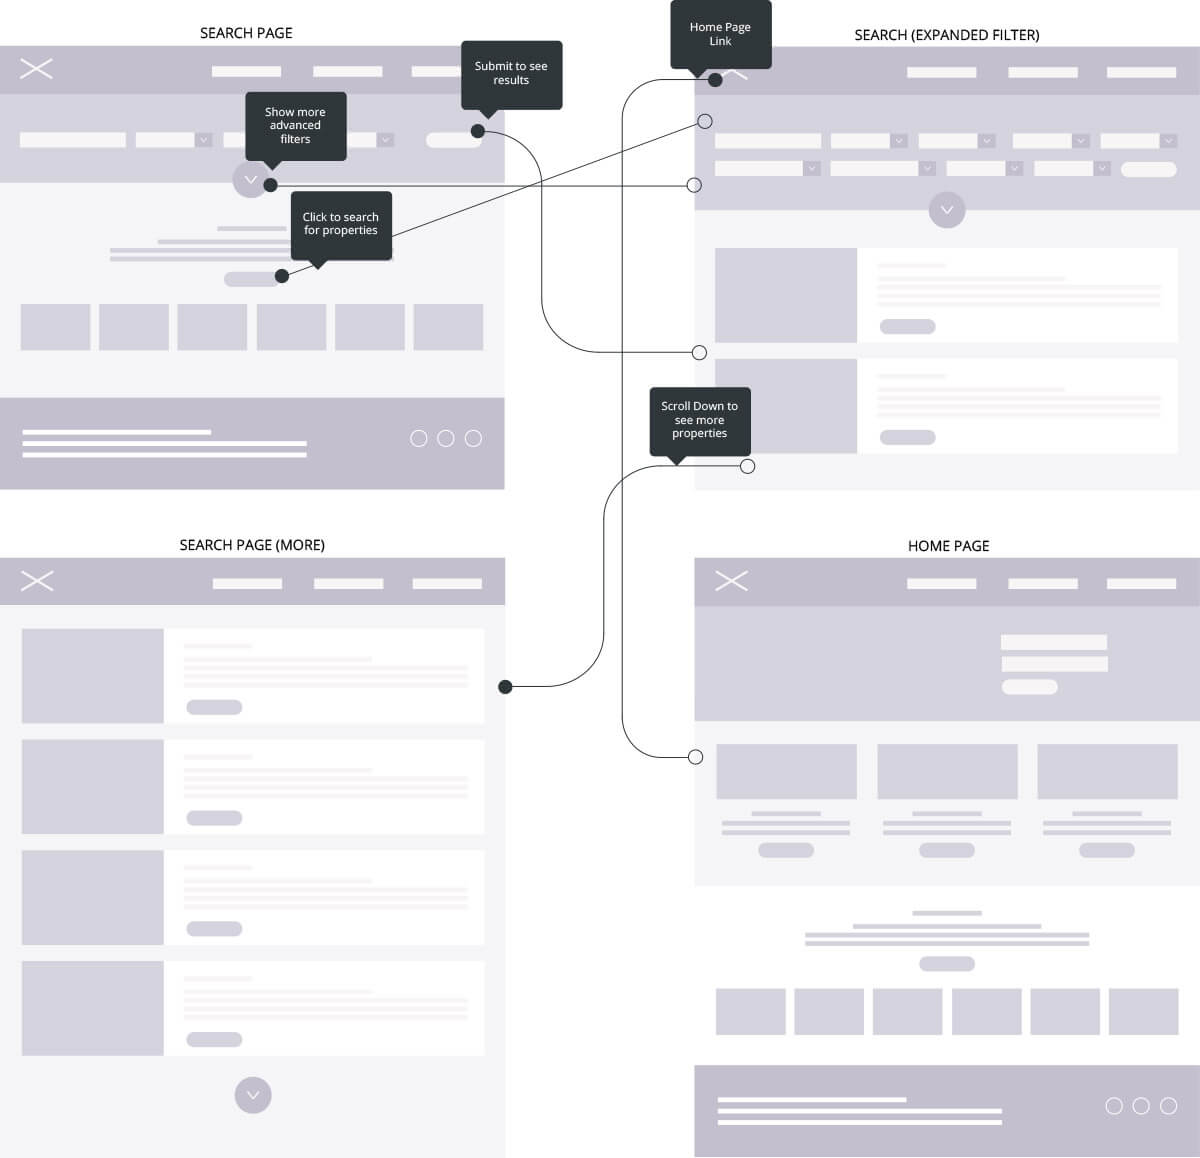
This phase is where my designs start to come to life. I start by drawing things on paper and then create a low-fi wireframe. The image below represents the low-fi wireframes built for the client. It also shows user flows along with key features that I have annotated.
Step 4
Design
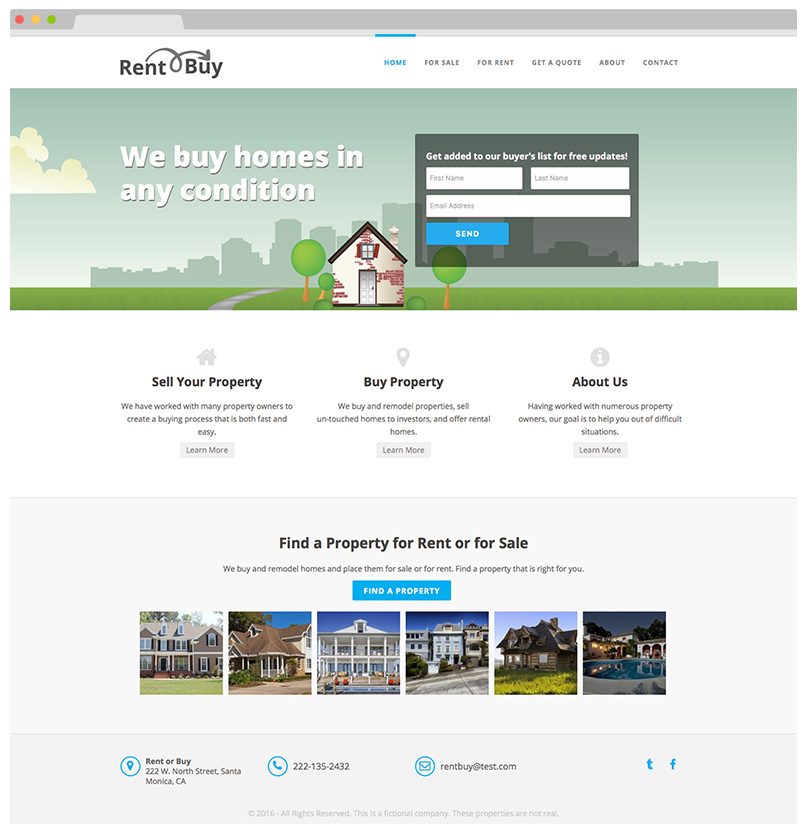
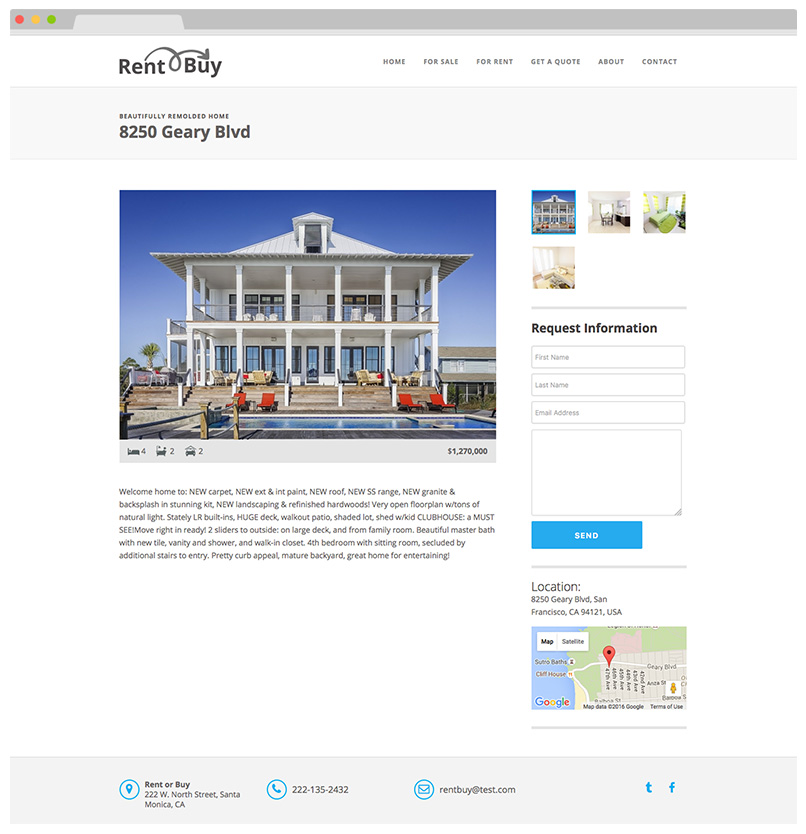
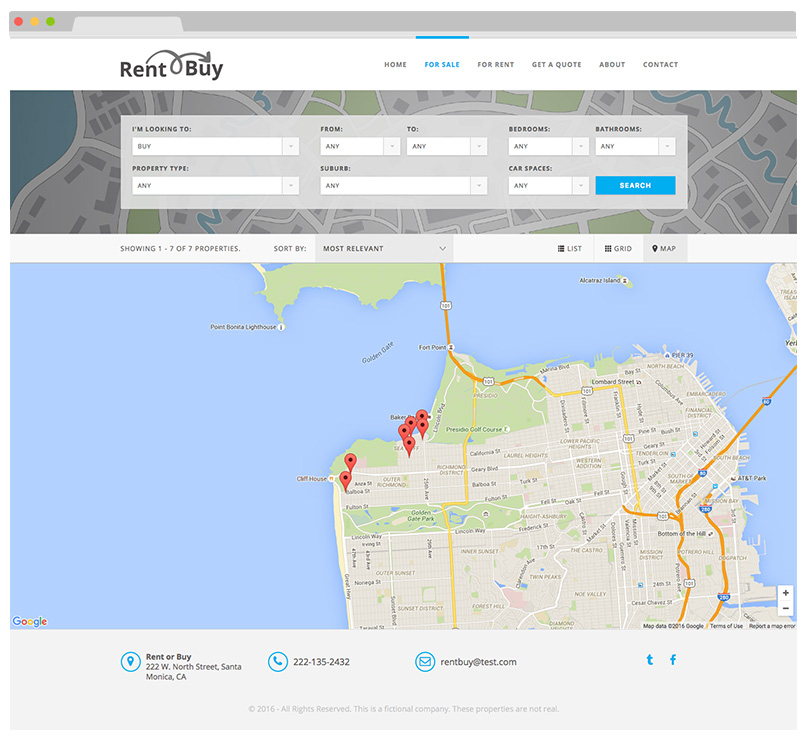
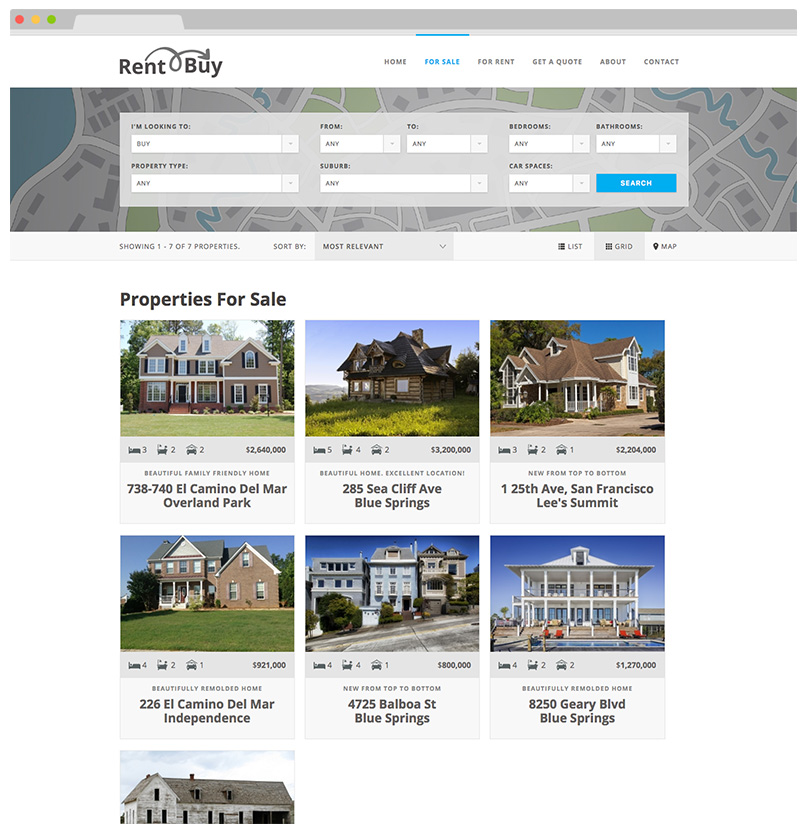
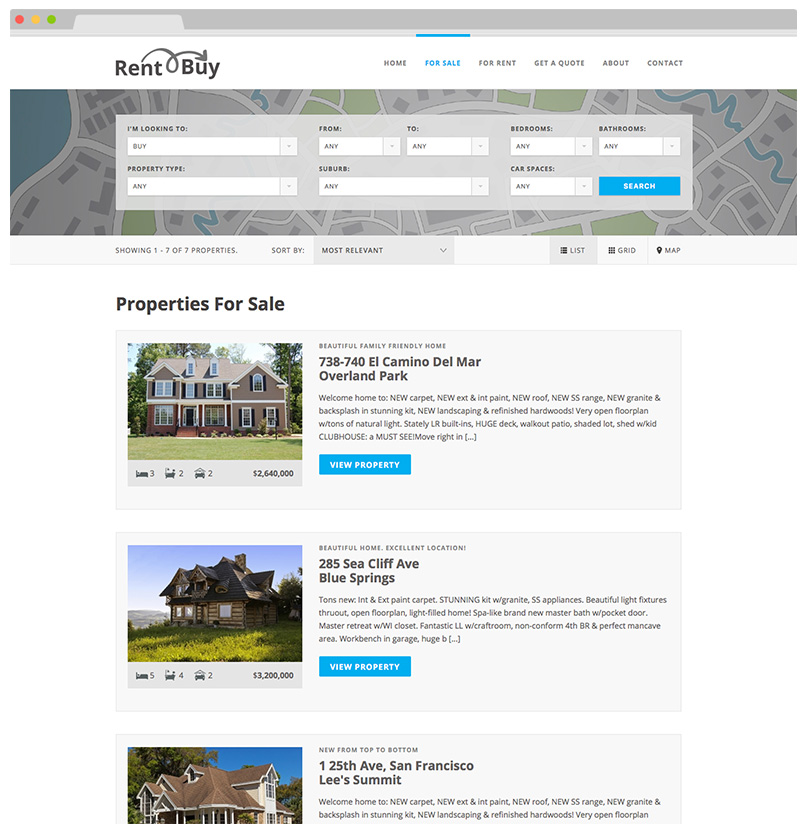
After wireframes have been developed and user flows have been defined, I move onto the design phase. This is where I create graphics, icons, color schemes, and choose fonts. For this client, I worked with them very closely and showed them designs on a page by page basis. This helped reduce the amount of time that I would have wasted creating multiple designs of which the client would have chosen one.
The images below represent the final designs for the site.
Step 5
Development
For this client, I was also in charge of development. In many cases, I work with teams of developers to flush out any technical requirements that are generally related to the CMS they are using. For this particular project, I was able to move to development very easily because I created the website designs with a full understanding of our limitations in WordPress.
Step 6
Testing
Once development was complete I conducted A/B testing on a few areas. This primarily focused around the filtration feature, color choices, headlines, and the home page form placement.
We also performed development testing which included:
- Testing multiple browsers
- Testing multiple device sizes
- Crawling the site for broken links
- Checking Analytics configuration
- And walking through the most important user flows.
Completion
After all of these phases were completed the client was left with a website that was extremely efficient and a strong understand of why certain features exist.

